
Hello and welcome! In contrast to last week, I’ve finally found my fall inspiration. And even though the weather feels like it jumped straight from summer to winter, I’m determined to do at least a few fall mani designs.
So back in October, Maniology released their monthly mystery box full of nail art goodies called the Mani X Me box. And did I need any more polish? Did I need more stamping plates? Did I need to spend more money on myself and my hobby? No to it all. But did I immediately sign up for the box? Yes I did! I just used the polishes for my Halloween mani, but plan to use the entire fall box this time. There haven’t been too many posts of how people used it, to help with my inspiration. But, there was one by @krissye20 that I thought was abstract, clear, and beautiful.
What I Used:
- Base Coat: Cuticula – Frooty Pebbles Silk Base Coat
- 1st Color: Formula X – Brain Power
- 2nd Color: Maniology – Spiced Orange
- 3rd Color: Maniology – Merlot
- Top Coat: Glisten & Glow – Top Coat
- Maniology Poli-Peel cuticle protector
- Maniology Mini Lotus mat
- Maniology M033 stamping plate
- Maniology M034 stamping plate
- silicone stamper & scraper
- lint roller sheet
- Twinkled T clean up brush, size #2
- acetone nail polish remover
I started with another fun scented base coat, and this Frooty Pebbles smell is my absolute favorite! Again, I just wish the scent lasted longer. I should have gotten it in a top coat because I feel like their top coat scents last longer. Then, I added two coats of a nude brown polish. I’ve had this polish for years, and I never noticed how much I like it paired with my skin tone.
Next, I added liquid latex all around my nails. I originally didn’t want to have to clean anything up. But you’ll notice that I gave up on that after a while. And then, I dry brushed the red in horizontal lines only. I wanted the red to pop behind my stamping, but I didn’t want it to be a mess. Or to cover the nude completely.
Two coats of Formula X – Brain Power, plus liquid latex all around my nails 
The red dry brush in horizontal lines
The stamping was last, and I expected it to be quick and easy. But, of course, life doesn’t always give you what you want. I tried stamping the gold on my ring finger first, but it was hard to see it. Even with the red dry brush, the gold just wasn’t popping. So I immediately changed it up and stamped the rest of my nails in red. But the new problem was that the red blended in to the dry brush in the background.
So after letting those nails dry, and removing the liquid latex, I stamped over everything in gold. My ring finger was the only nail that needed to be stamped in red before doing gold again. But that is when I realized that I liked it better with the gold on bottom and red on top. And instead of redoing all of my other nails, I chose to leave a different “accent” nail. And to tie them all together, I added another layer of stamping. But this final layer was to stamp the large leaves one more time, in red.

The first gold stamp didn’t show, so I switch to red 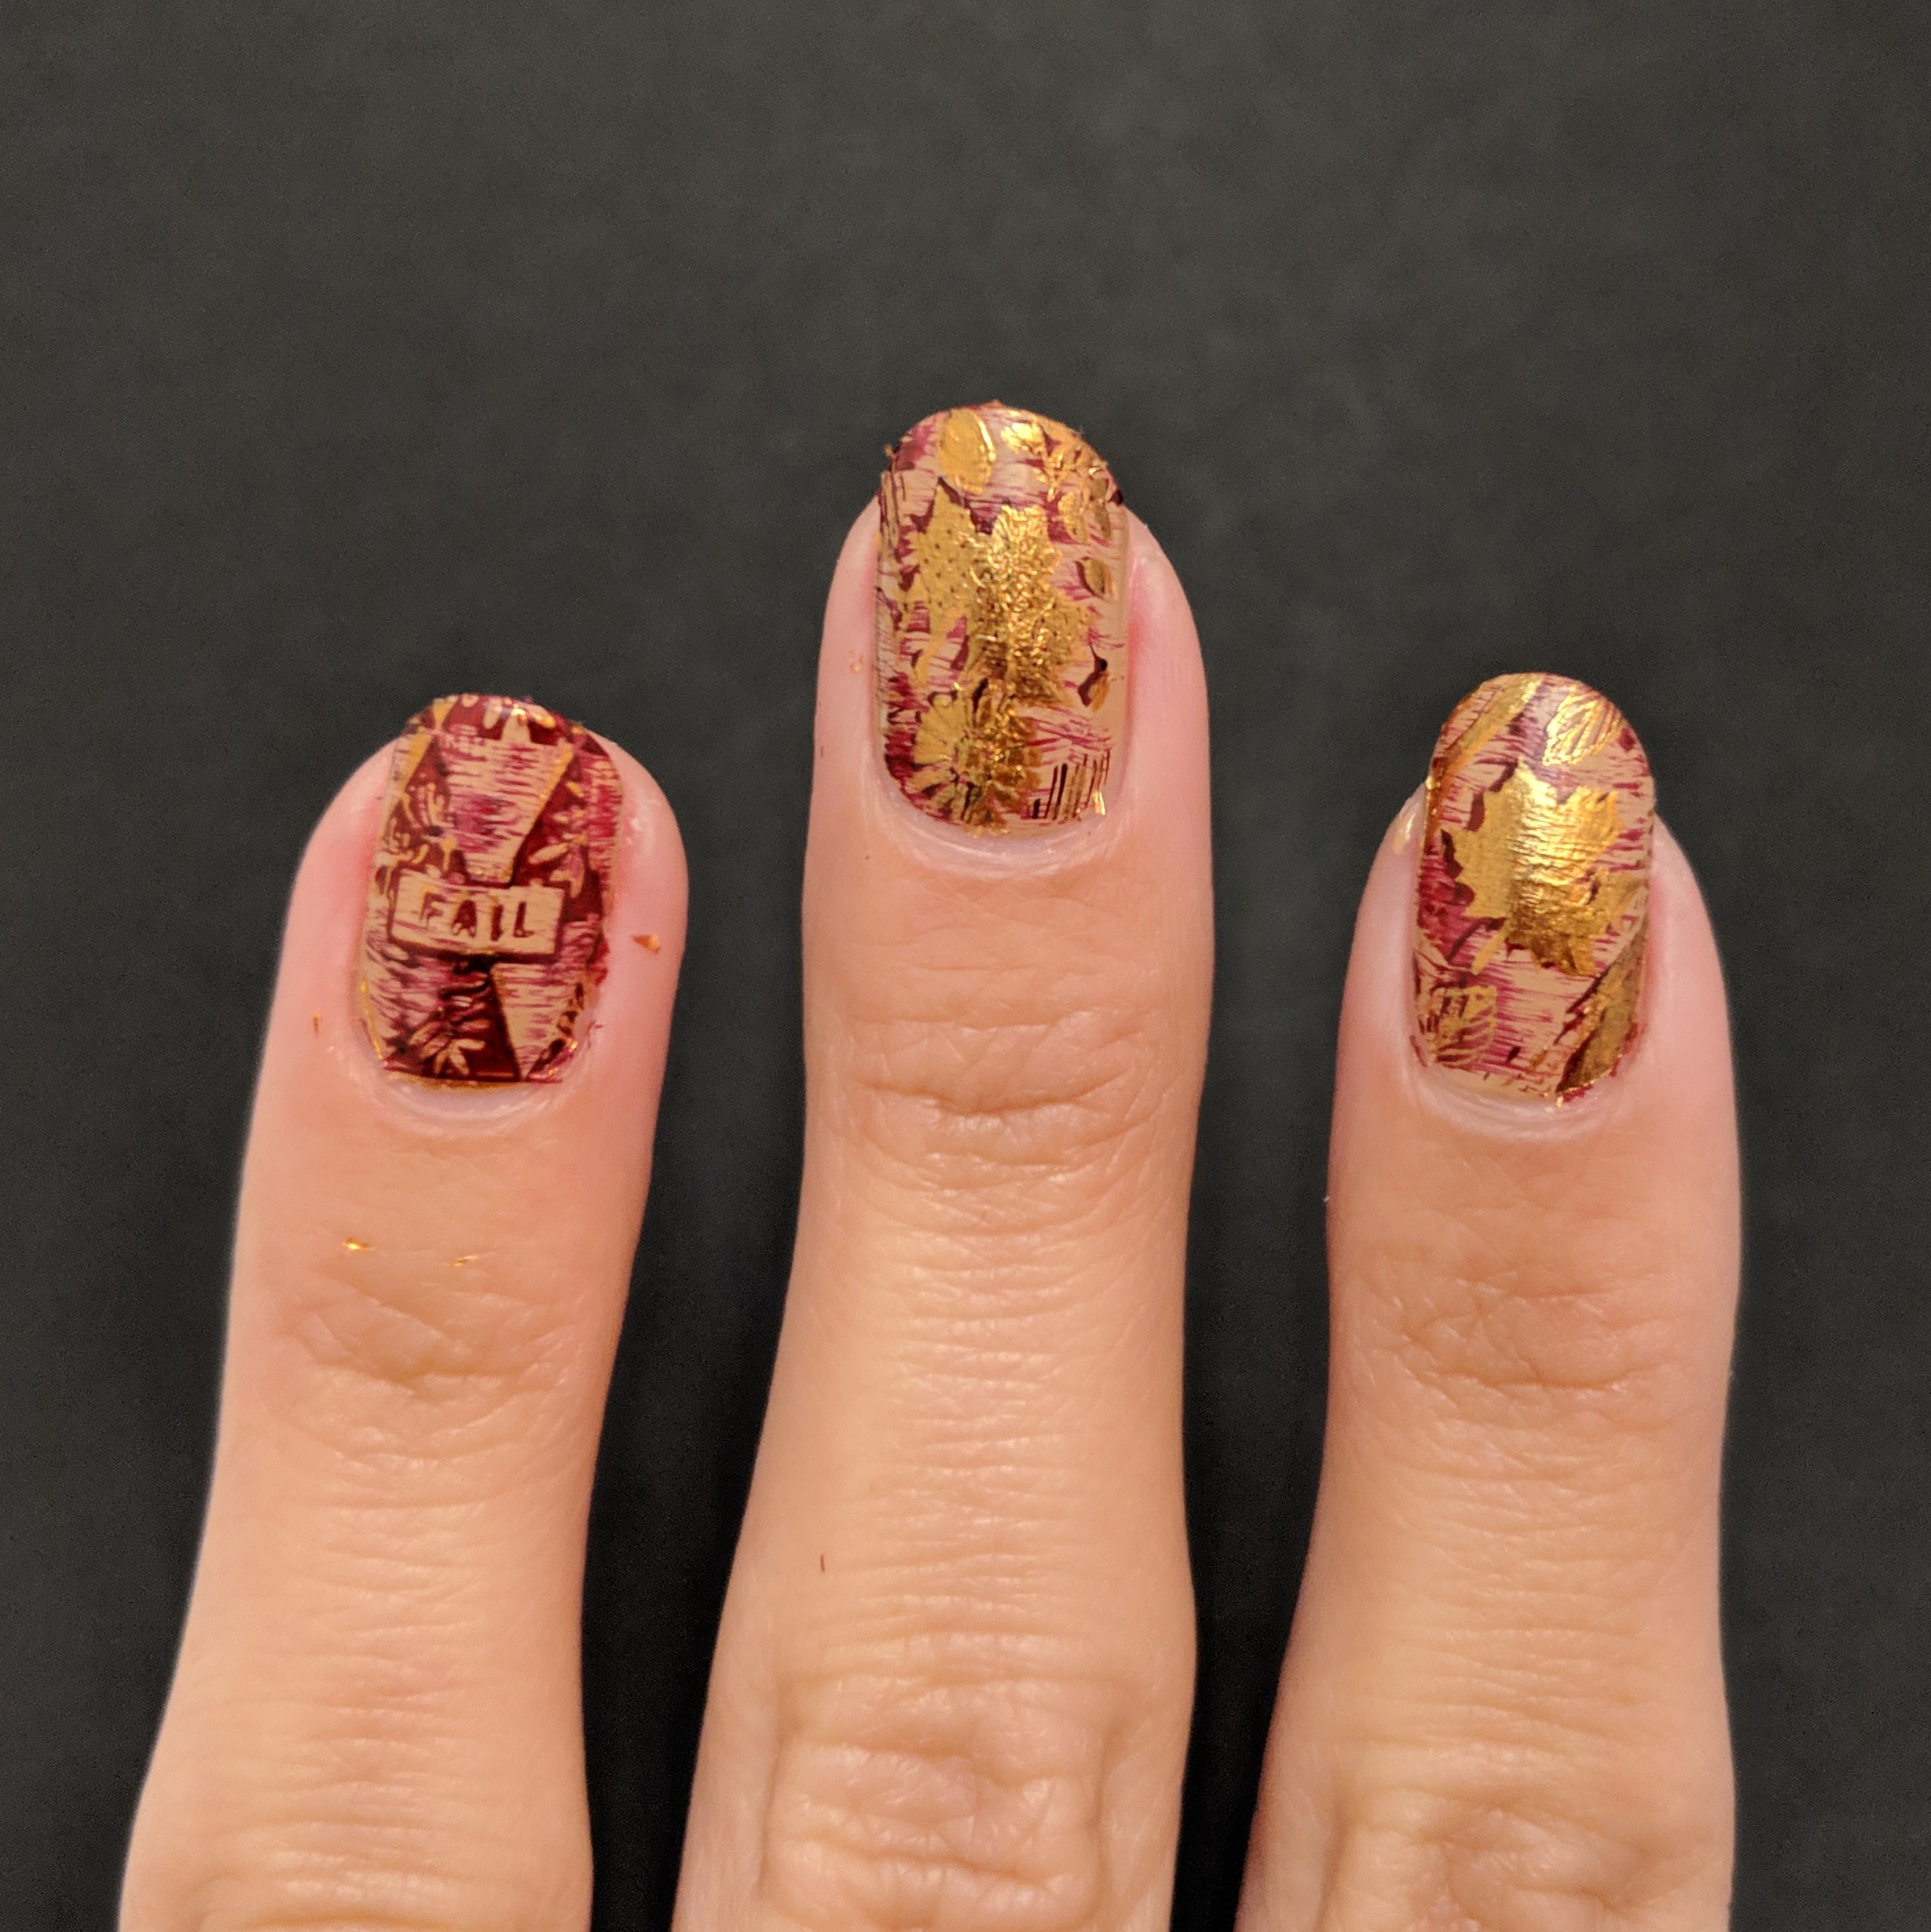
Added gold stamps on top of the red
Nothing about this mani looks like what I was picturing. But I’m really glad that it at least looks like it belongs in fall. And these polish colors are just gorgeous. They’re definitely what’s saving the design, and what kept me from just taking it all off and giving up. Sounds a bit dramatic, I know, but sometimes it’s hard to give up what you were imagining.
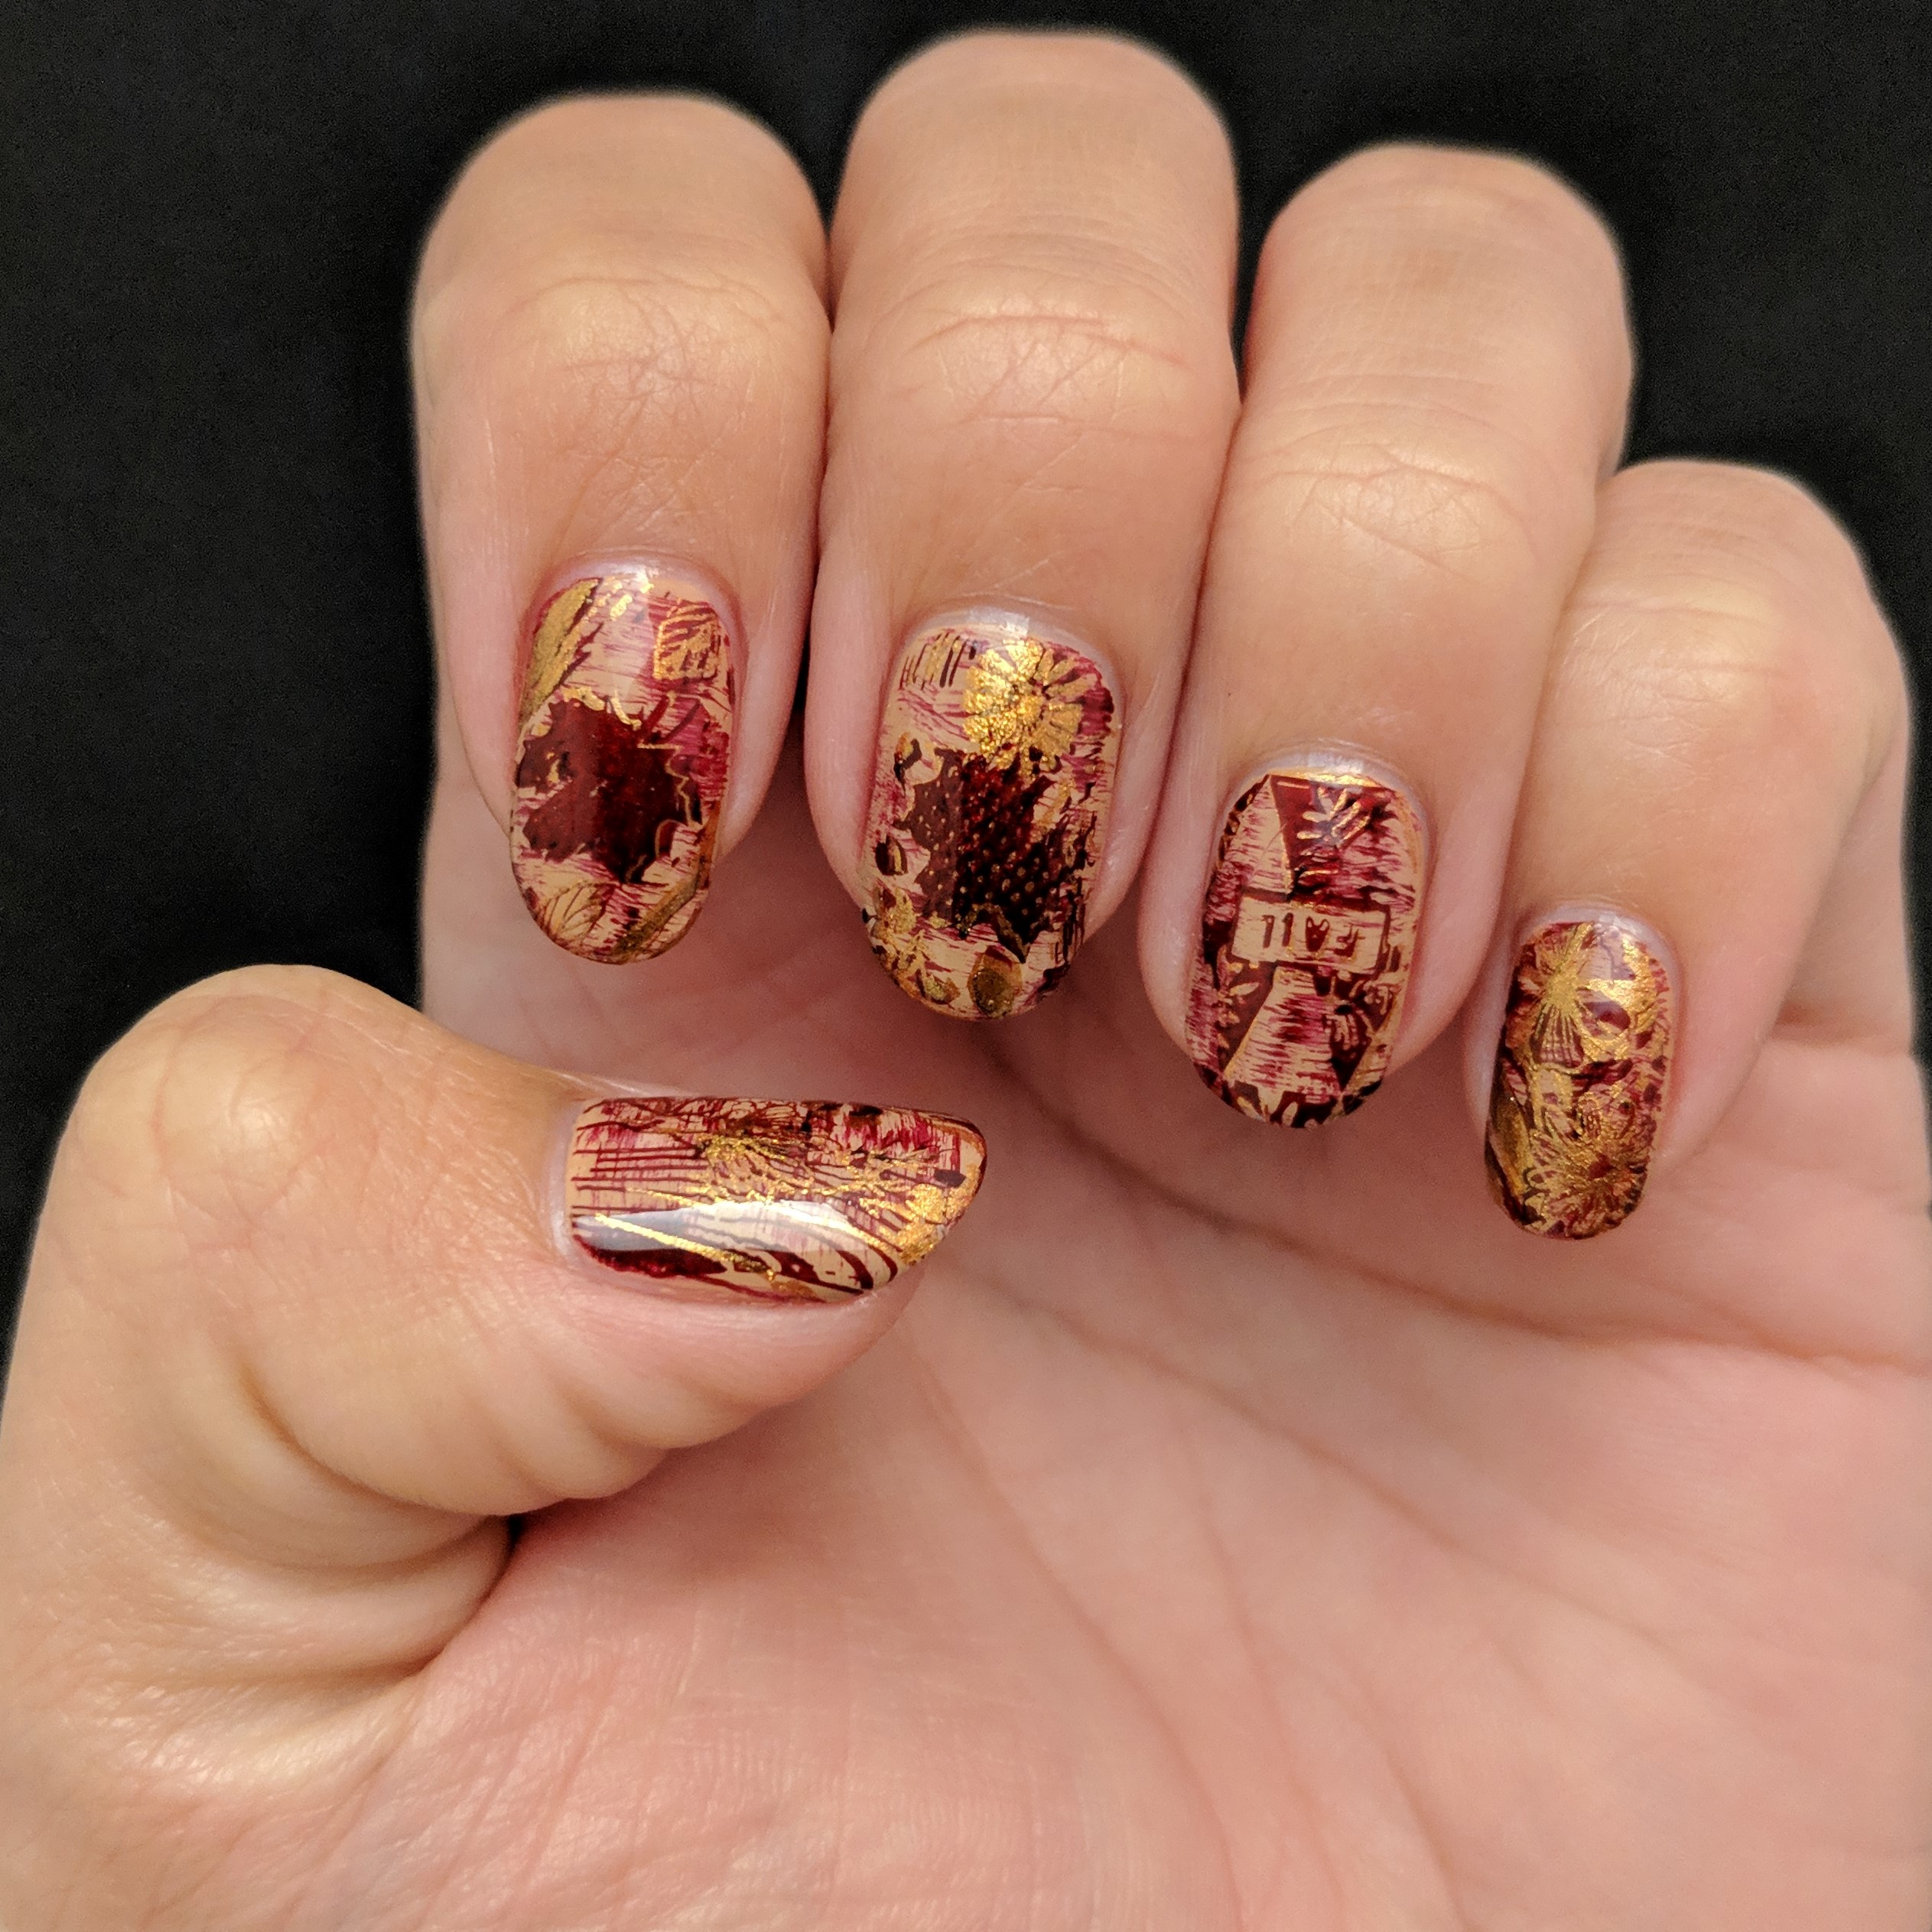
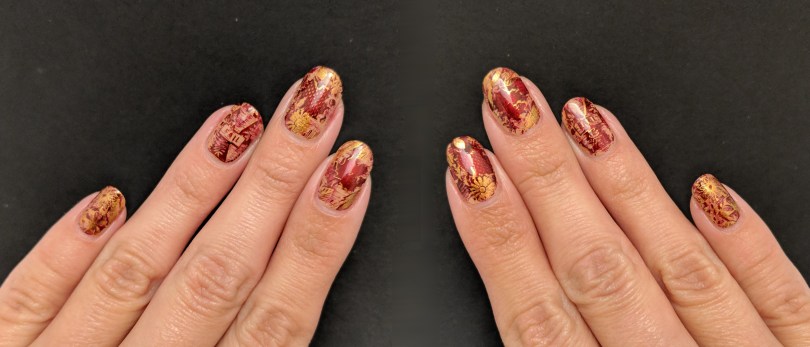
The final look – left hand 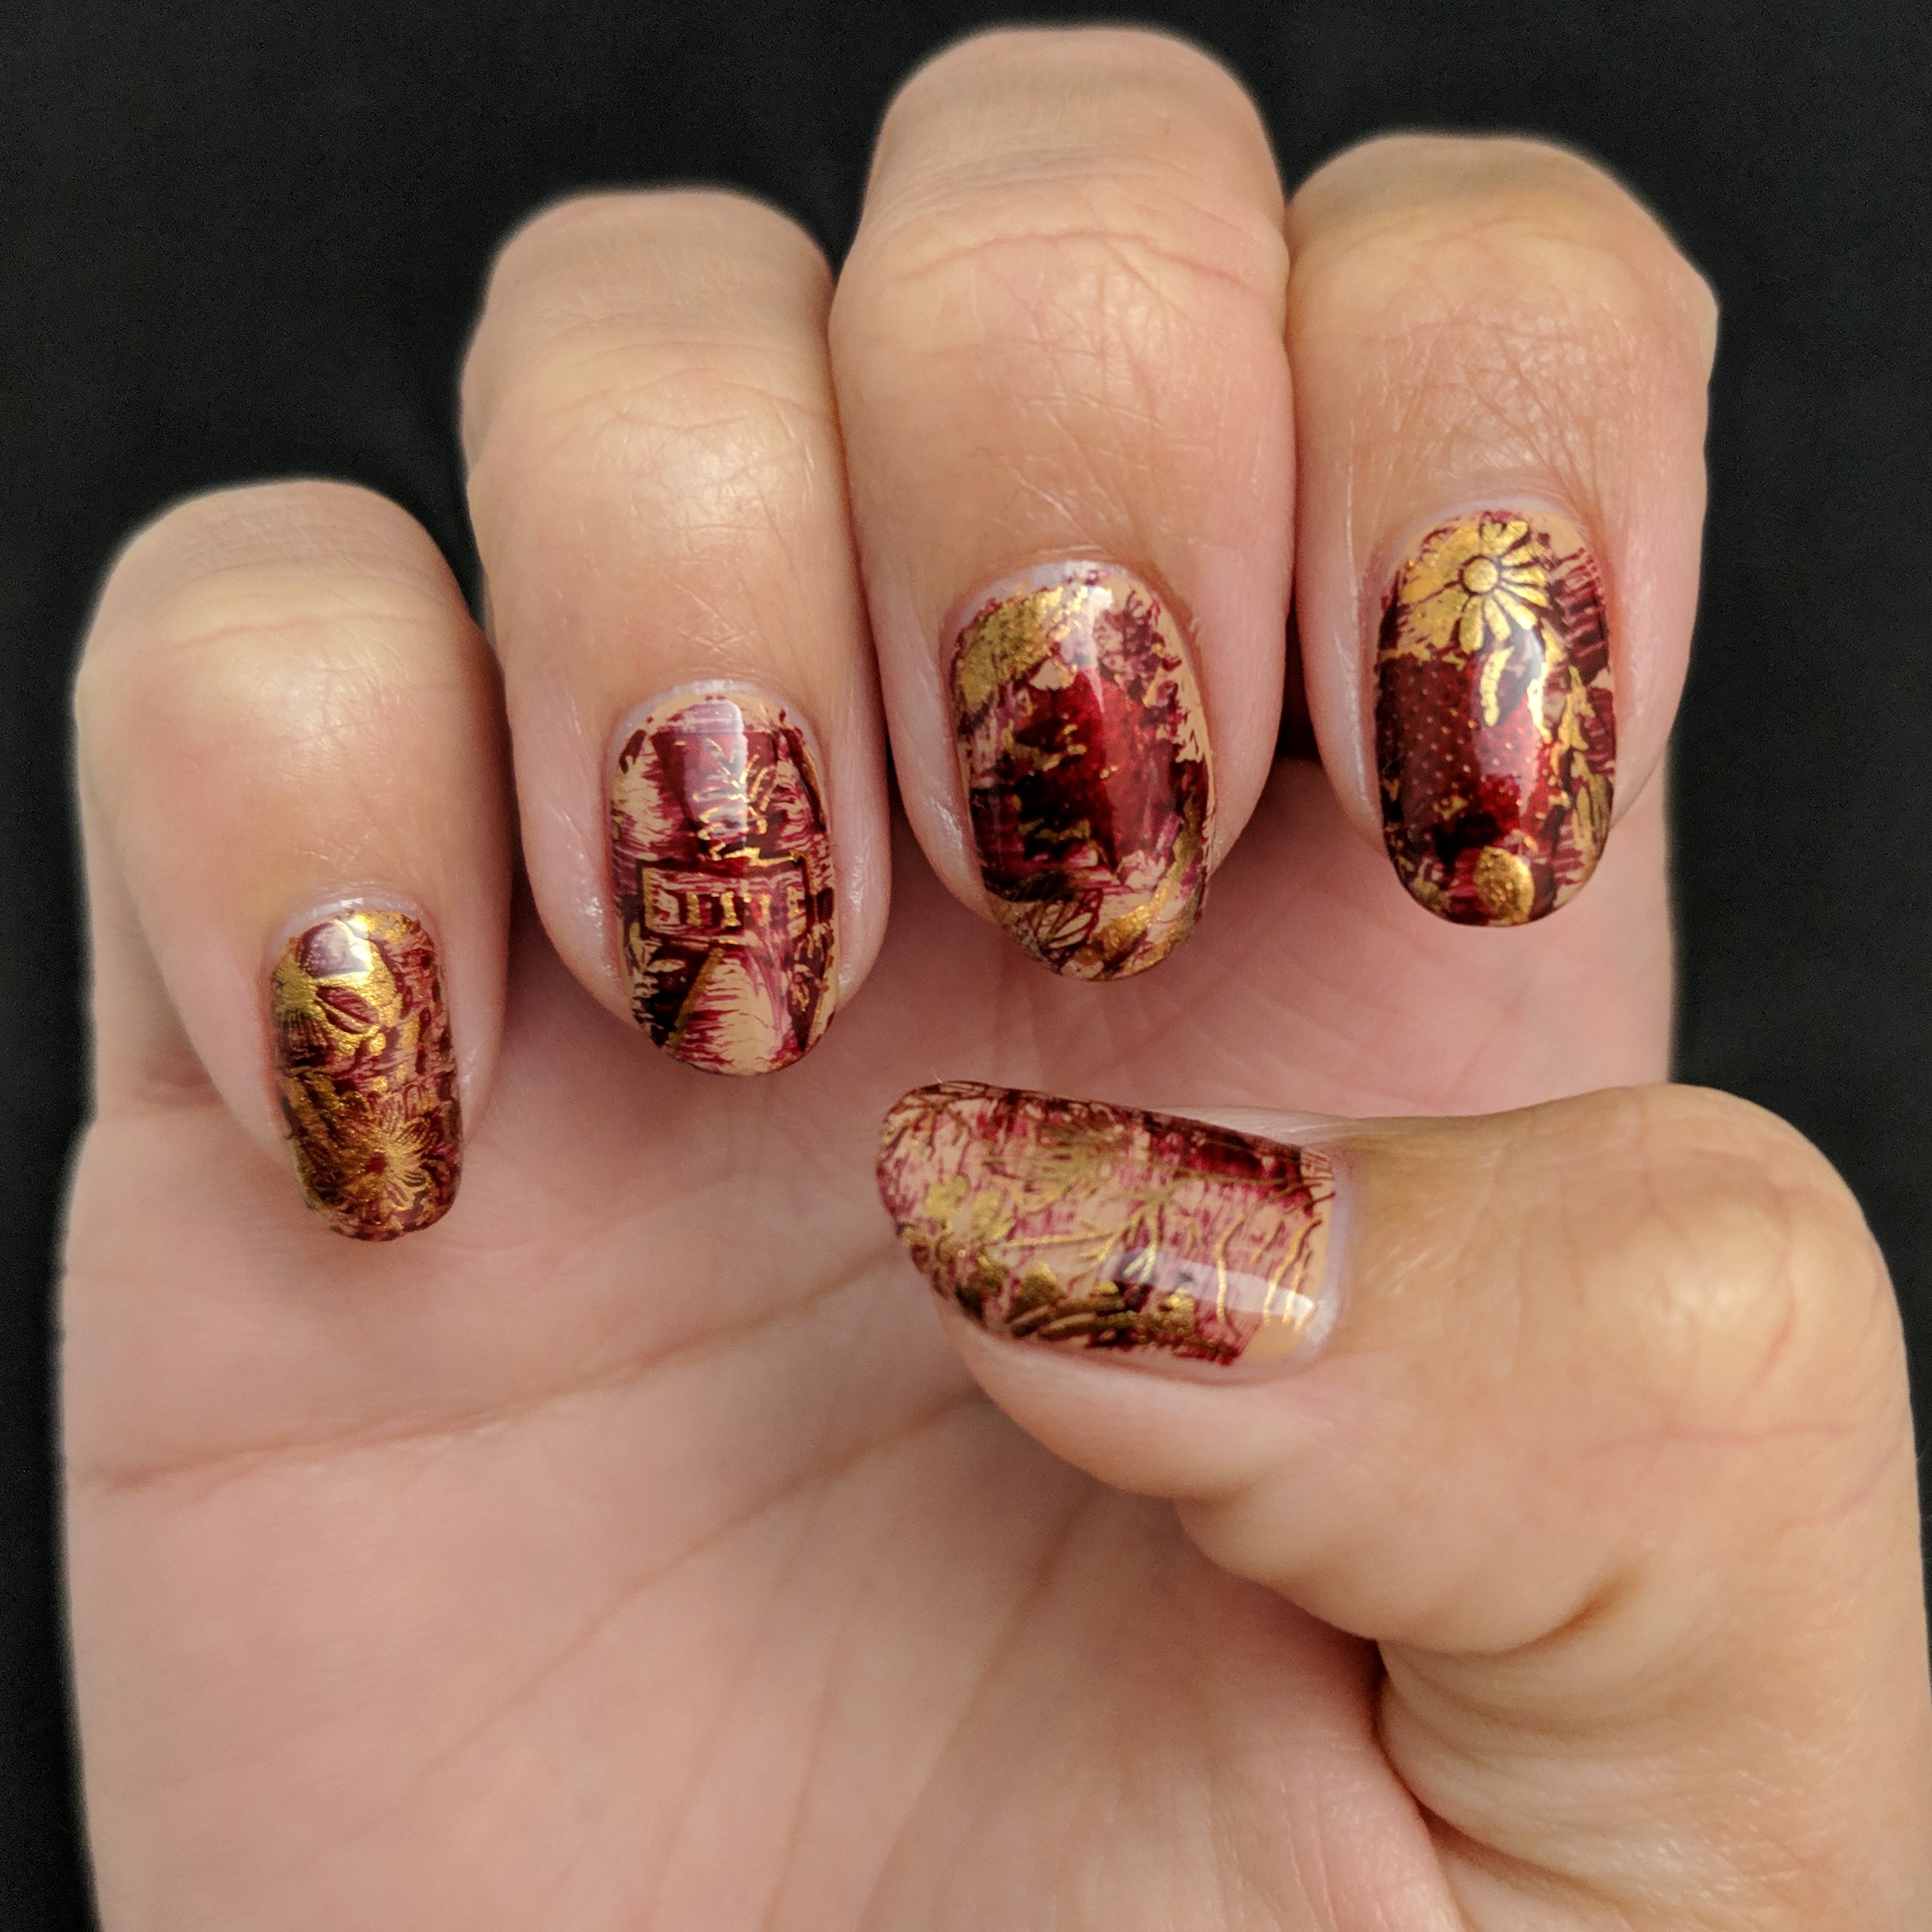
The final look – right hand
I hope everyone had a lovely fall week!
Update:
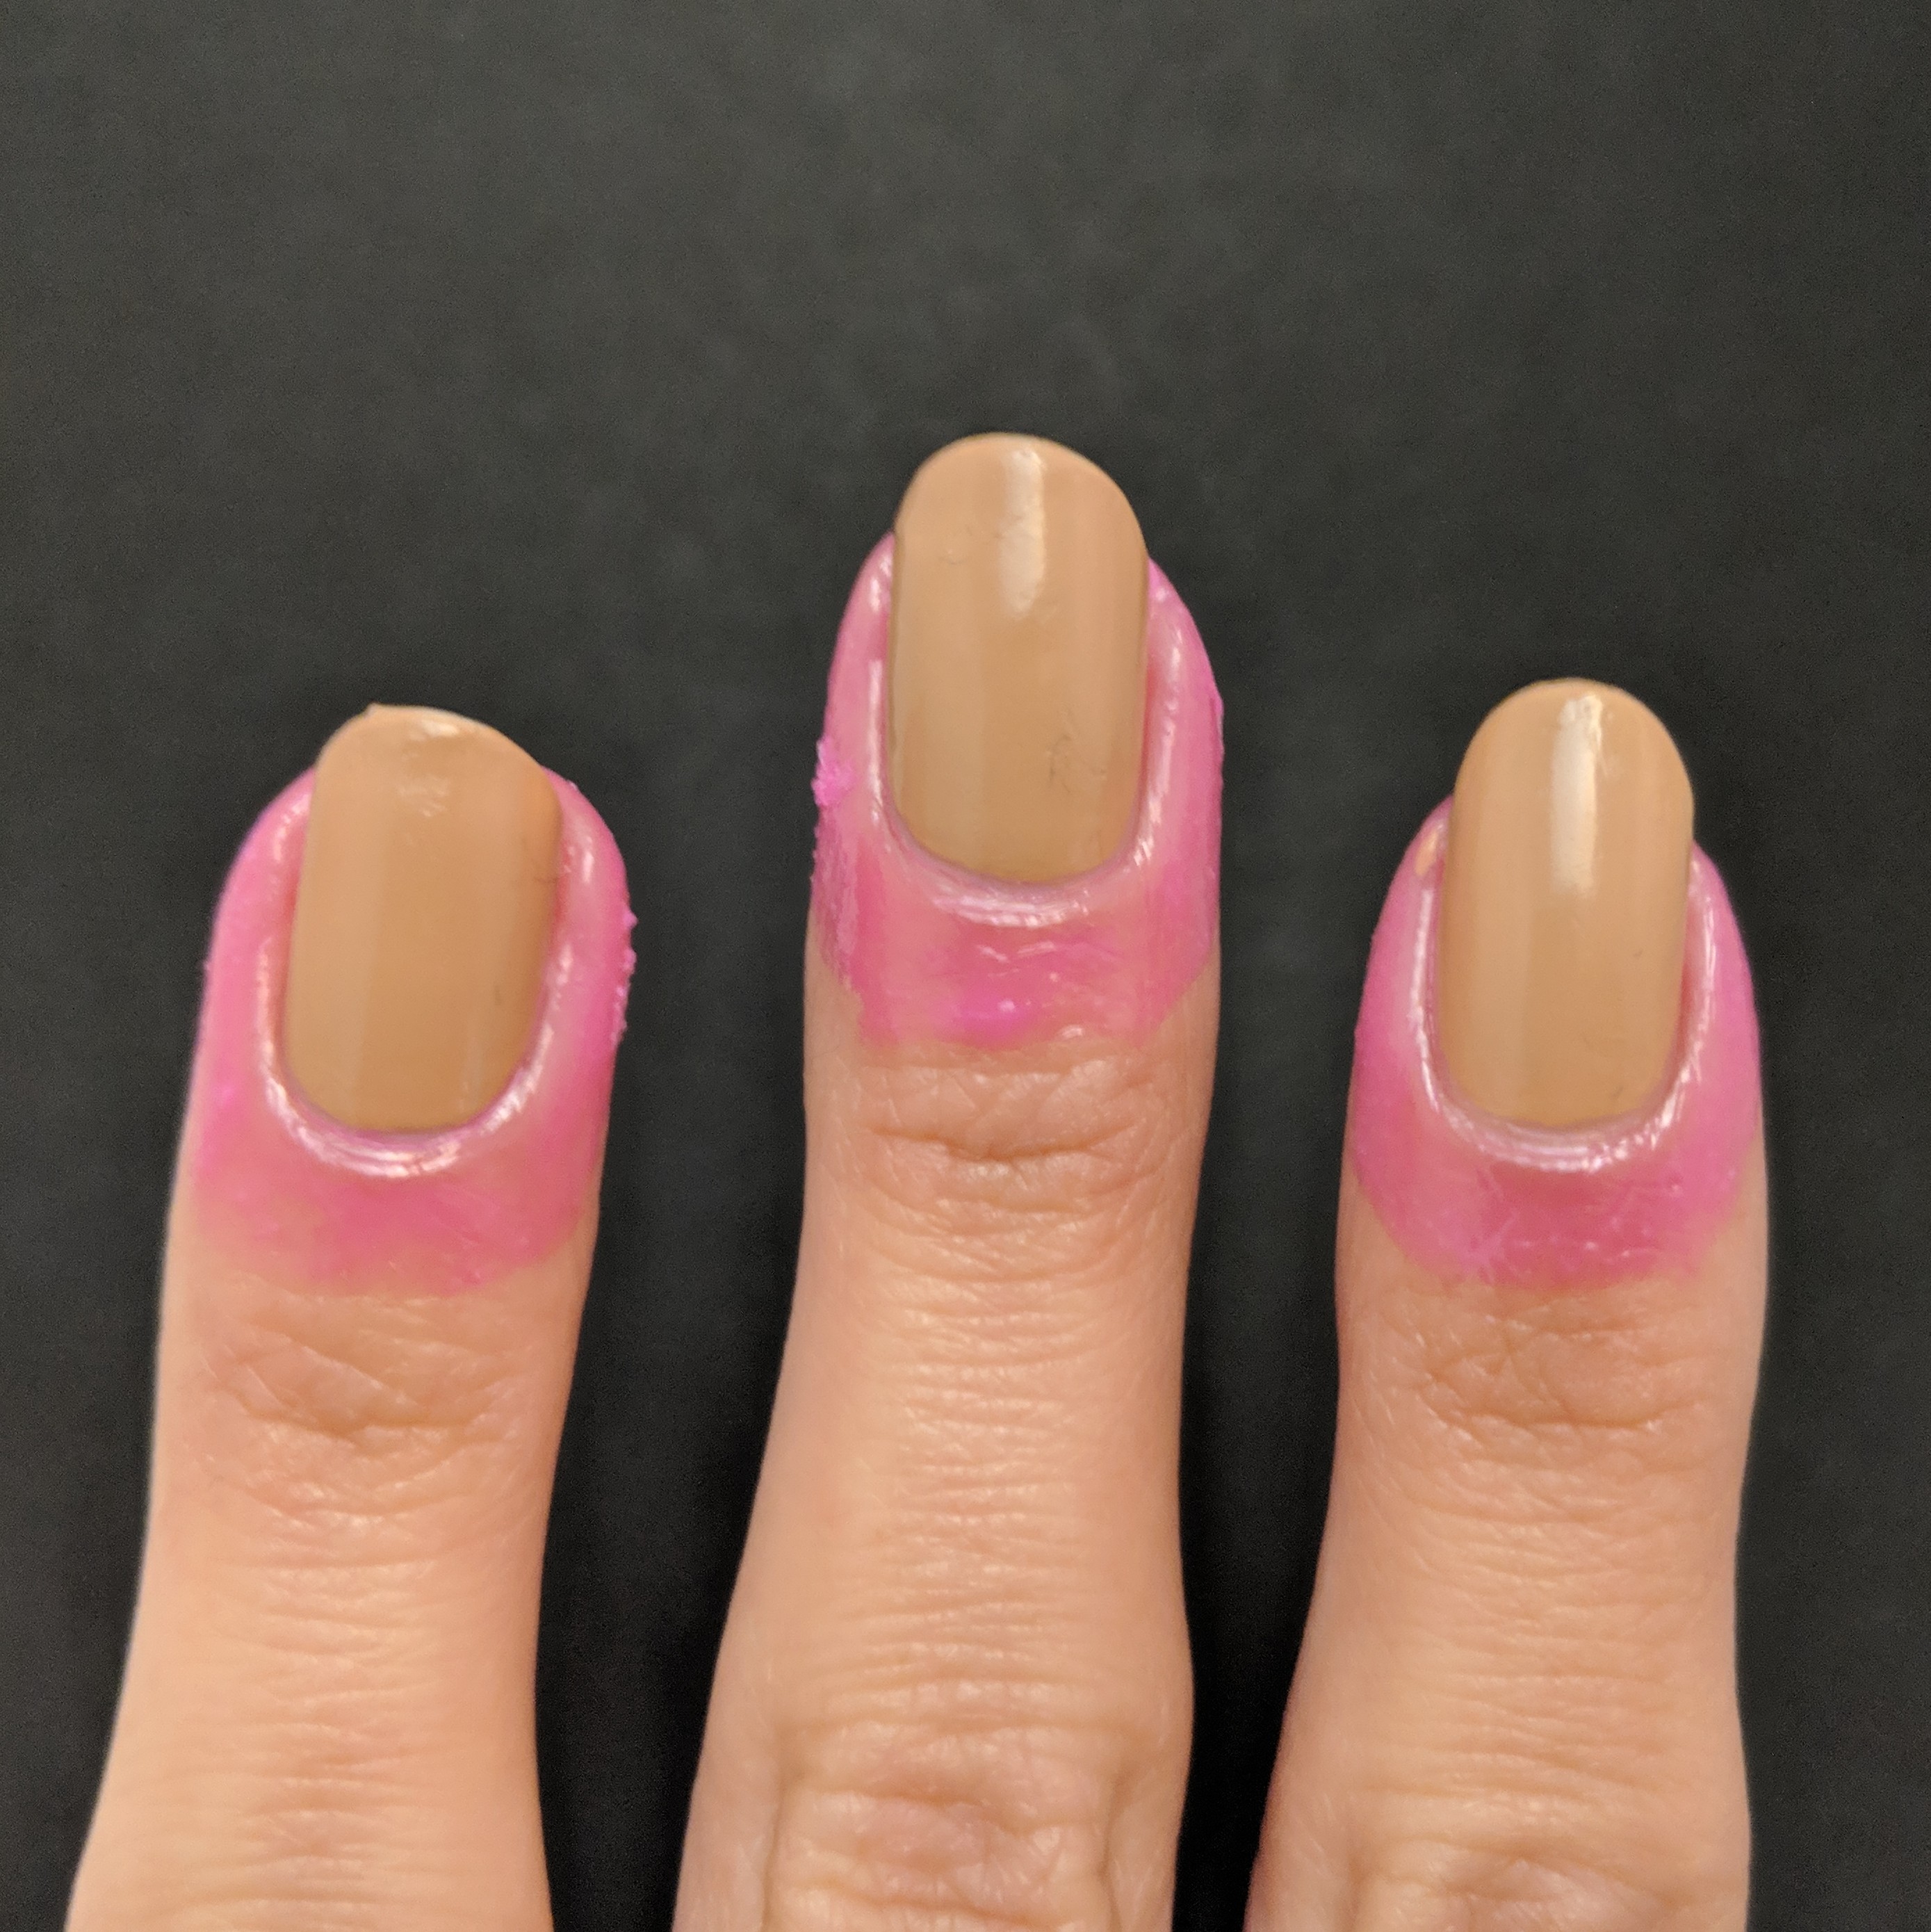
Oh boy did I ruin this poor manicure. All it took was one small chip on my middle finger, and then it just snowballed from there. I turned the small chip into a medium sized chip just from picking at it. And then as I picked, my thumb nails started chipping too. So I kept picking and picking until my poor natural nails were wrecked. I’m very disappointed, but also blaming it on end of the year stress. I’ll just have to be more diligent the next few weeks.
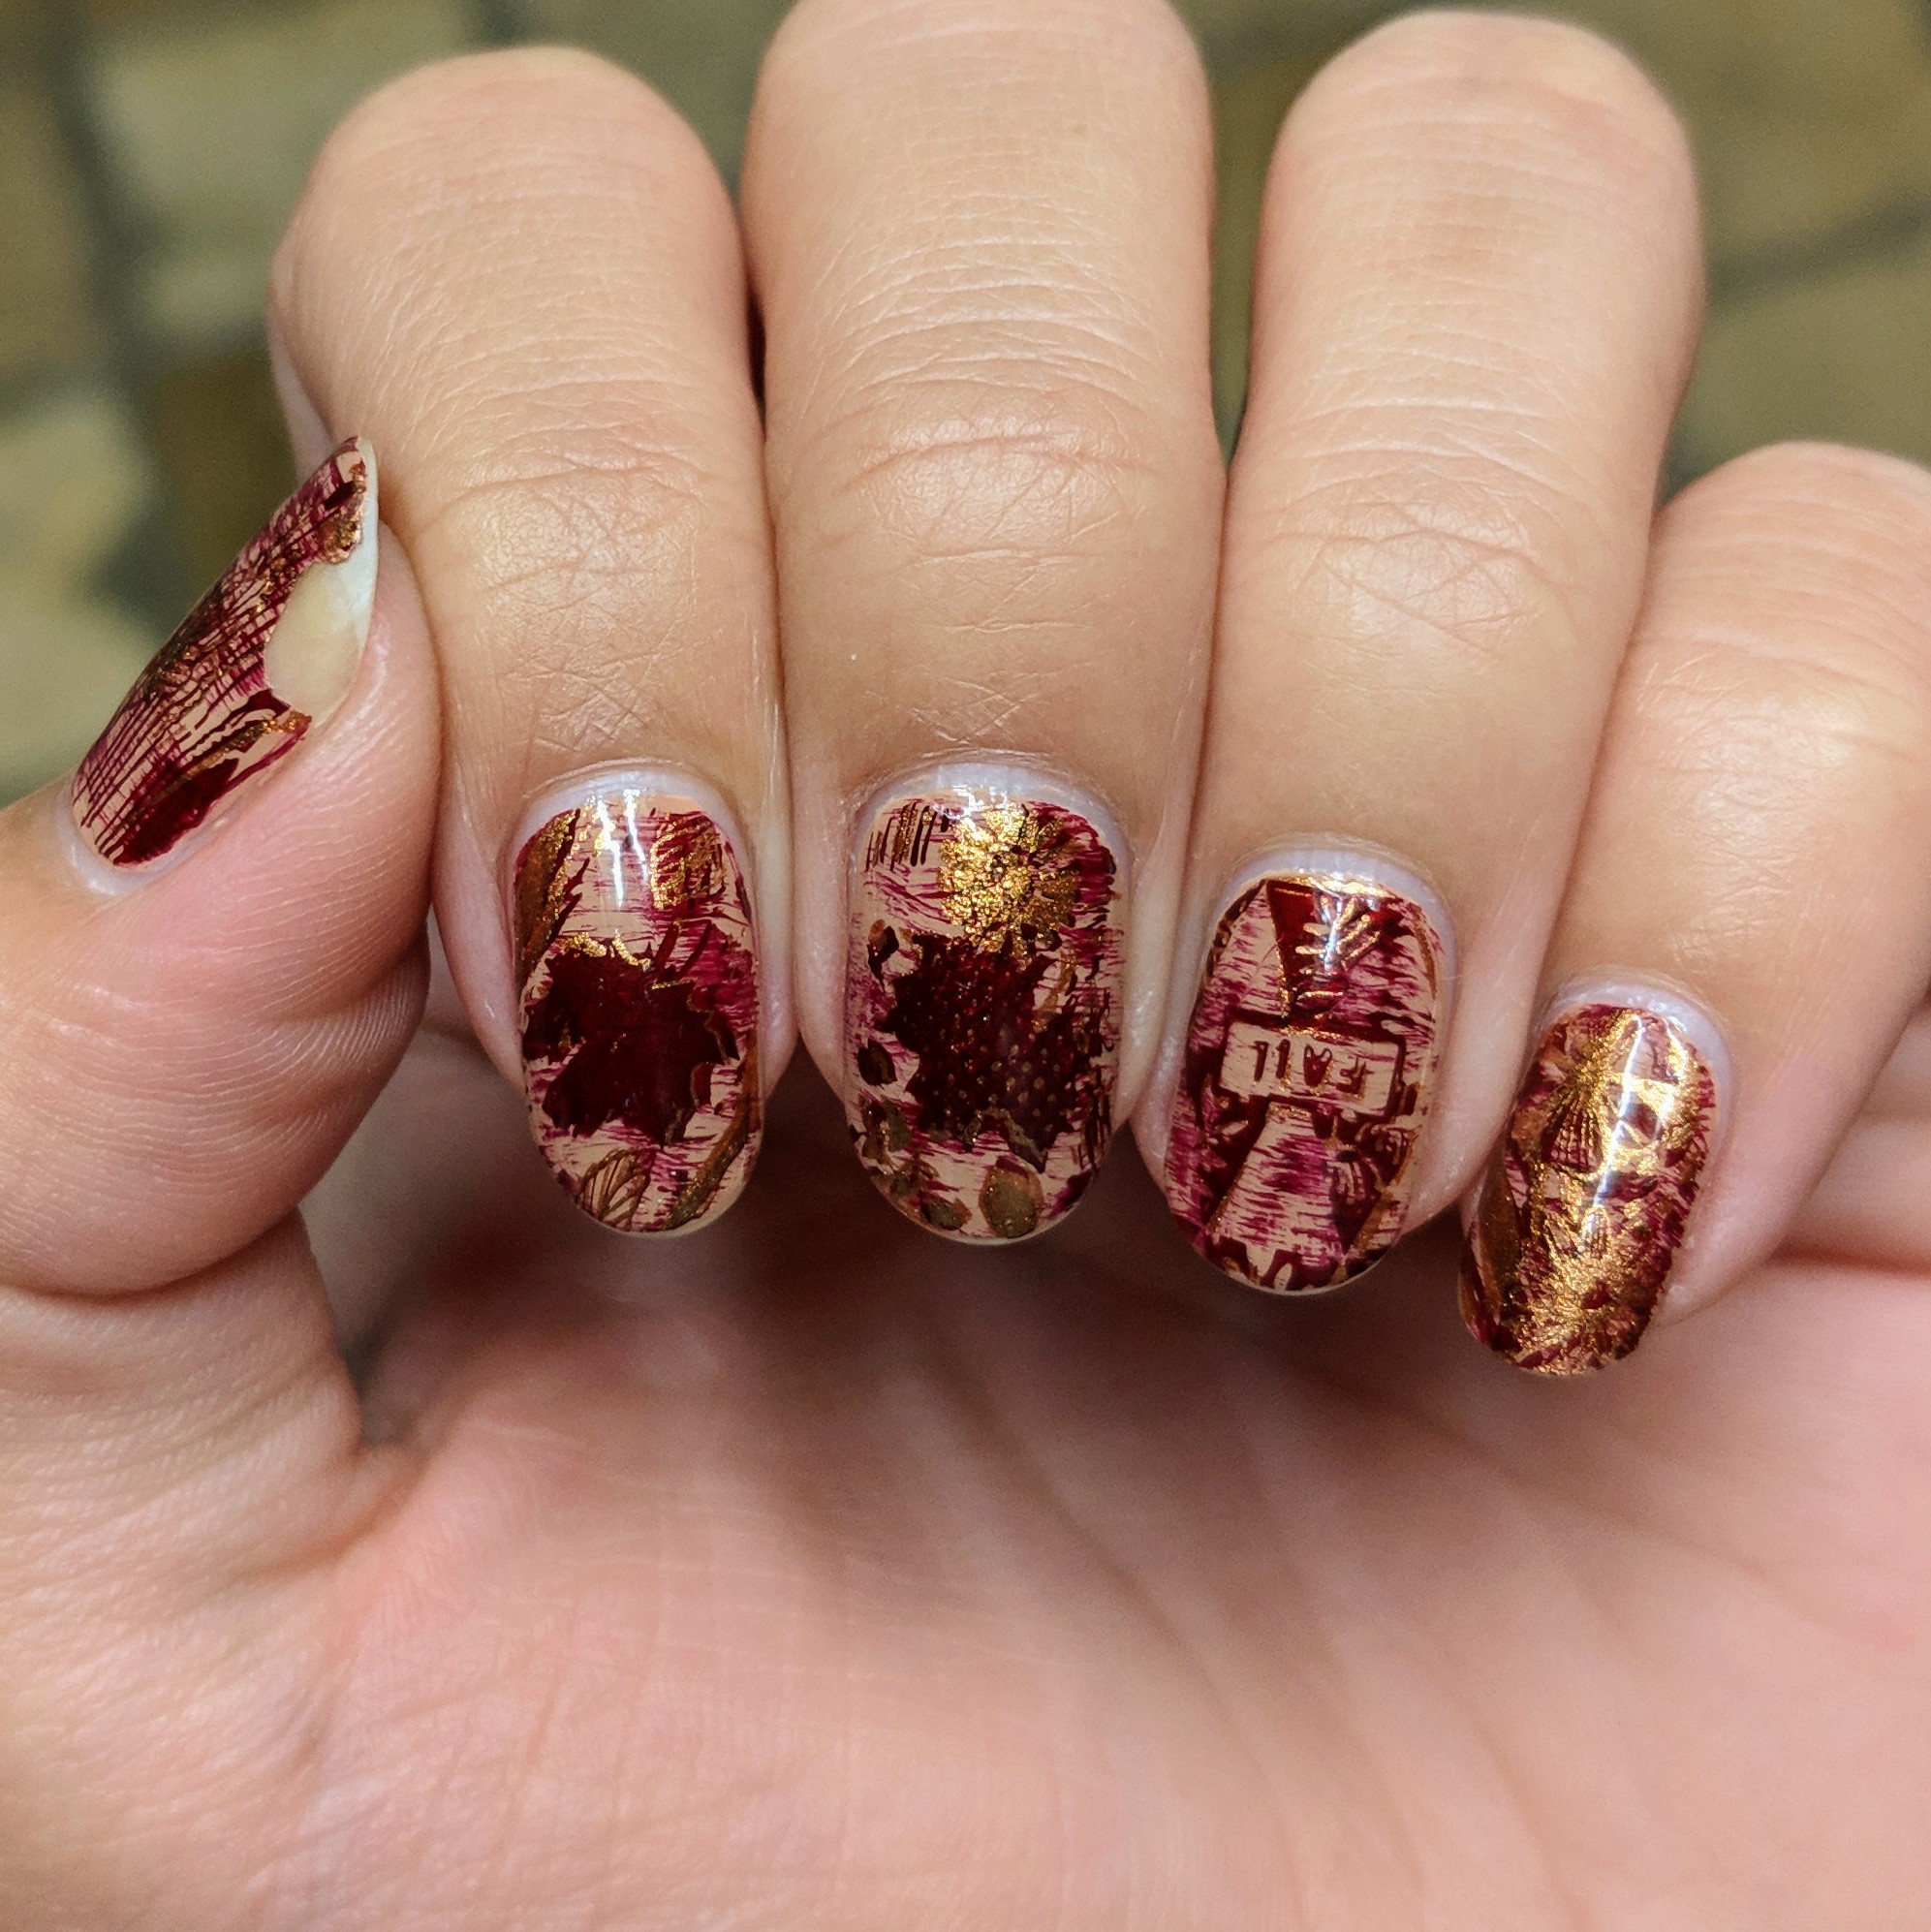
Some picking on my left hand too 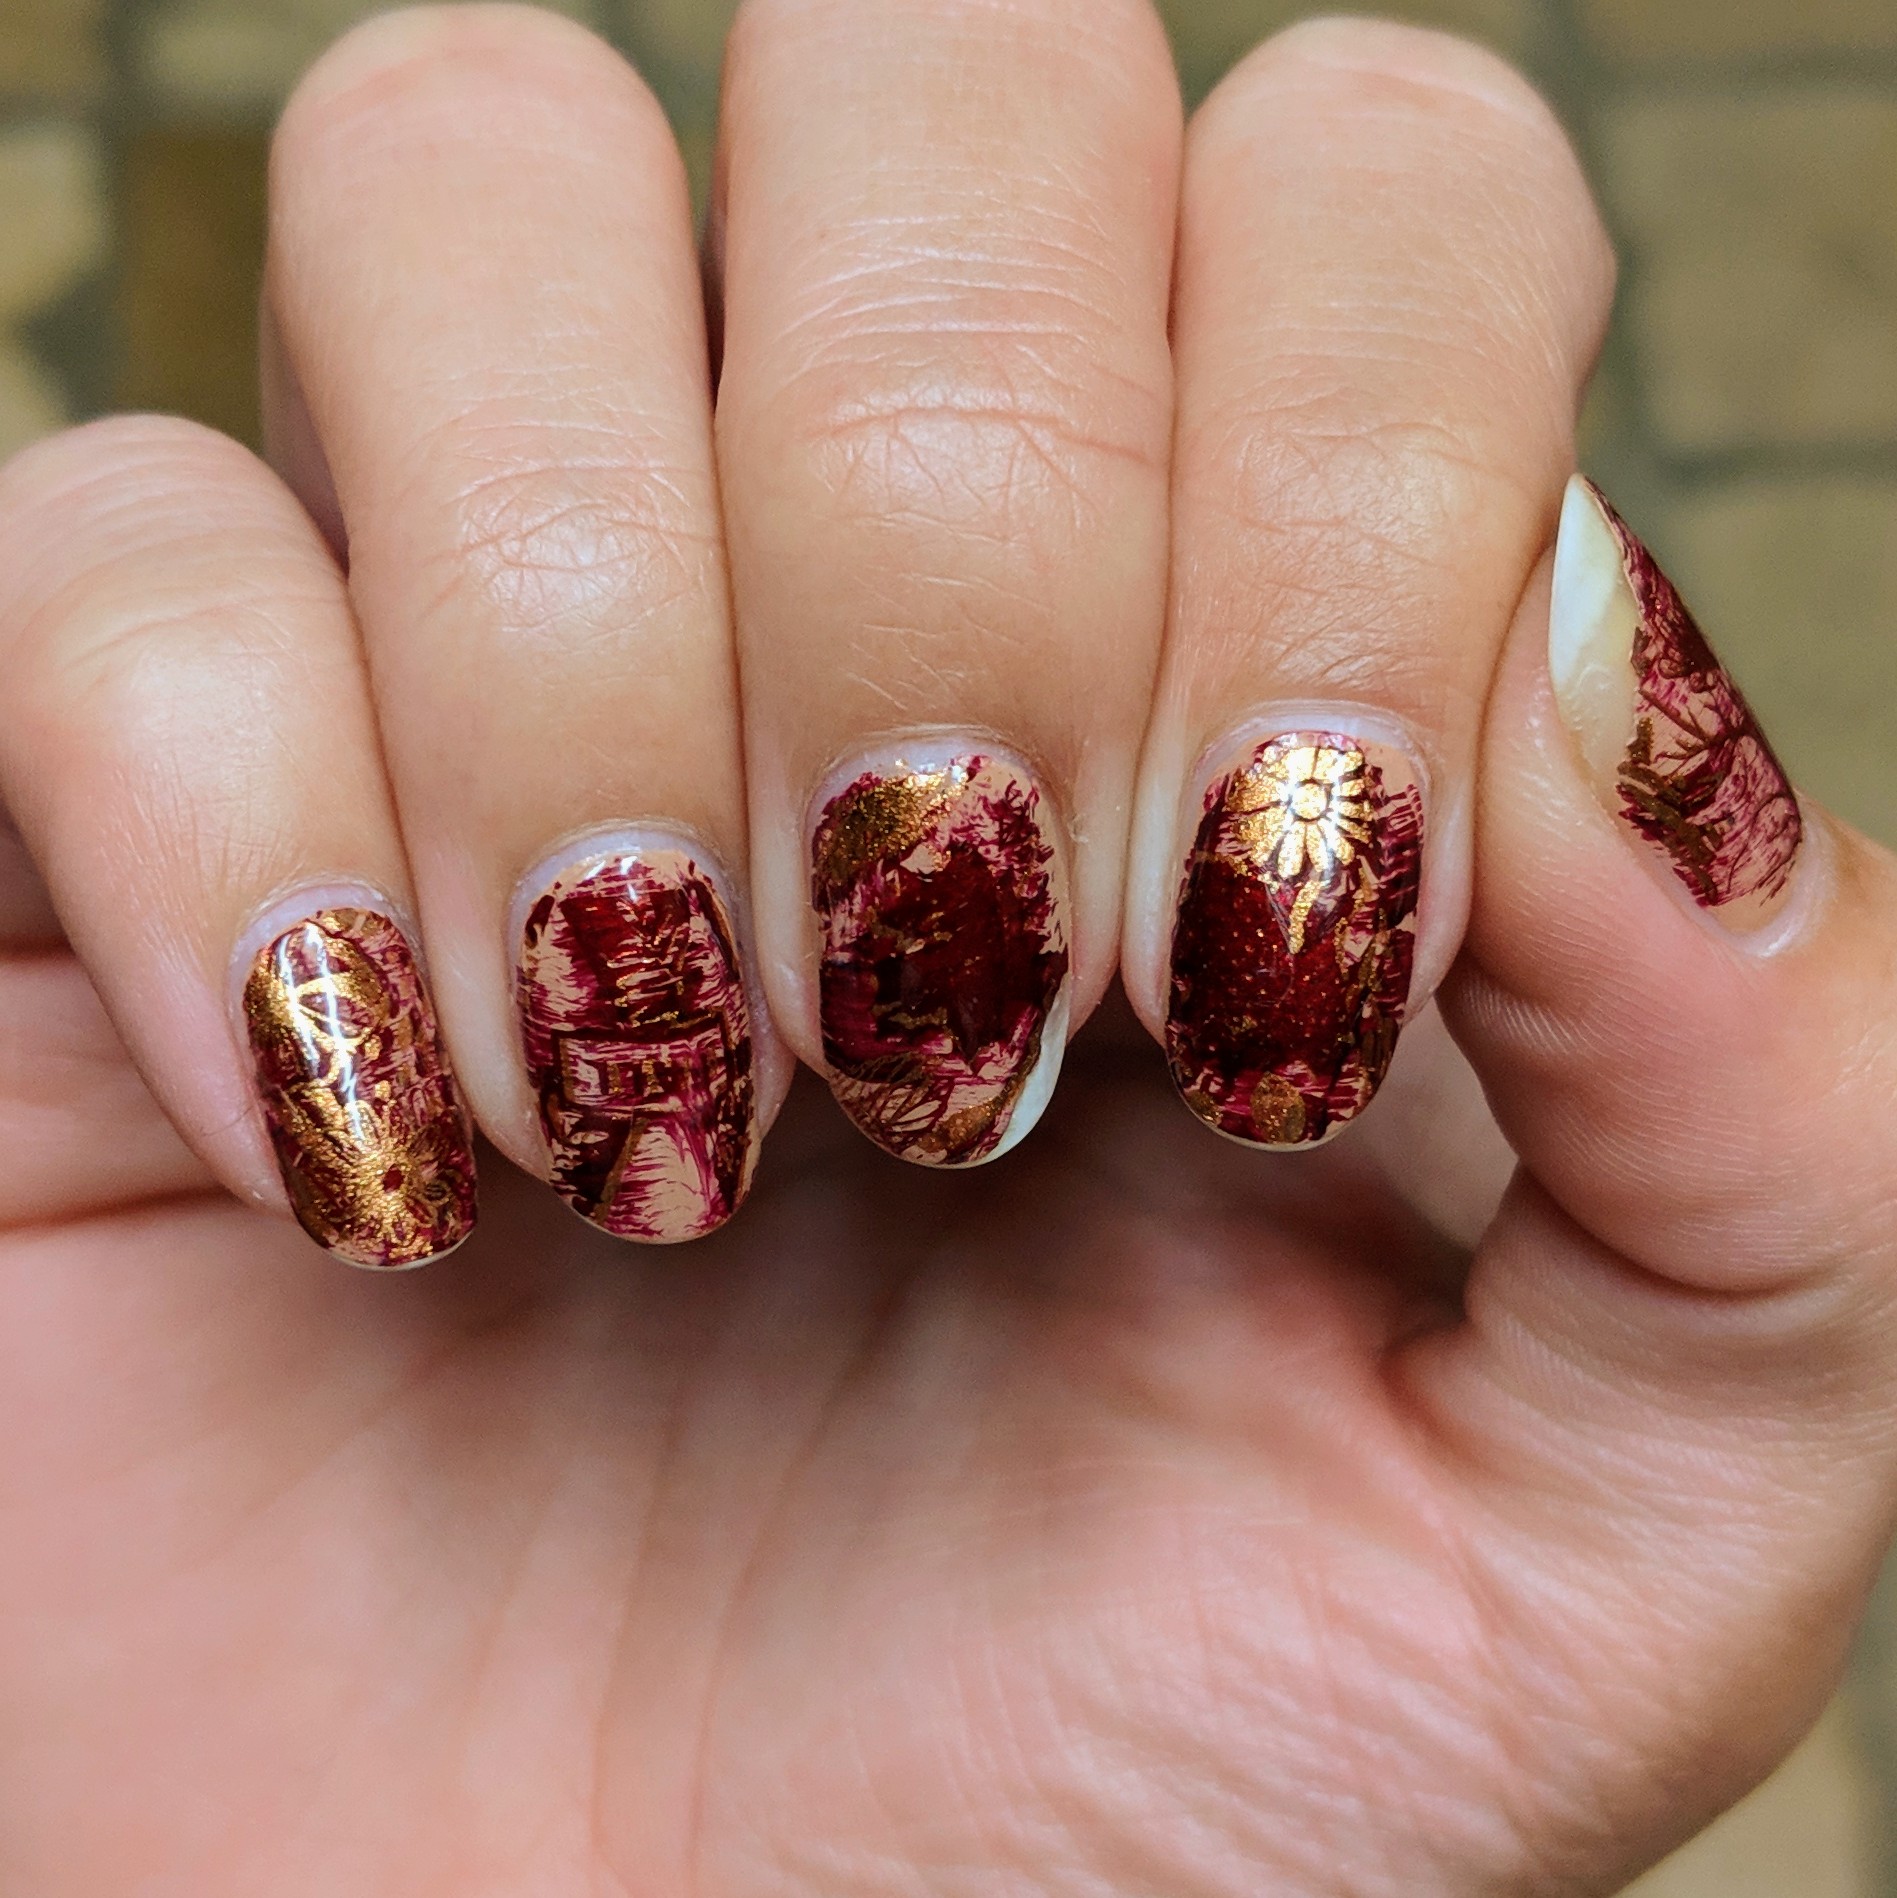
I picked so much on my right hand

GOODNESS, trying to leave a comment sent me on a WordPress adventure (so hopefully my comment doesn’t post twice? Ah, technology). Anyway, what I was trying to say was that finding out that there are scented base/top coats has blown my mind! Wow!!! And it smells like fruity pebbles?? And beautiful design, I’ve followed you on Instagram (I’m @pixellatedcake) and am excited to keep seeing your weekly designs! 🙂
LikeLiked by 1 person
Oh no! I’m sorry it was a struggle, but at least I only see one comment! Thanks for following 😊 and yeah Cuticula has tons of different scents but in my opinion, nothing tops fruity pebbles
LikeLiked by 1 person
Well I need to check that out then! I’d never even considered that it was a possibility! Haha
LikeLike