
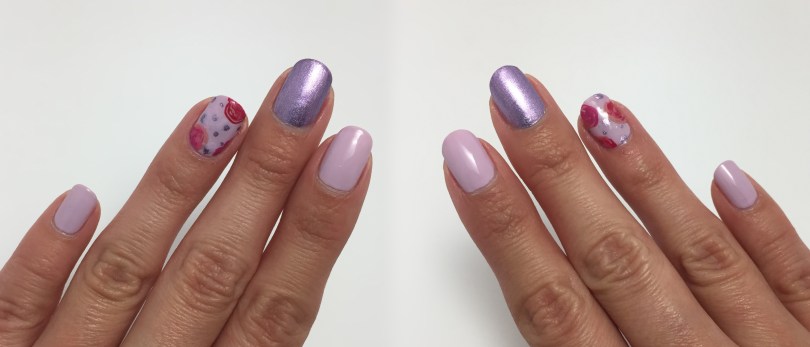
Hello everyone! After last week I wasn’t sure if I’d be inspired this time around. But, I’ve got my mojo back! For some reason, a colorful floral mani was just calling my name.
For inspiration this week, I first popped on to Pinterest to look for ideas. But everything I was attracted to was the bright yellow sunflower designs, and that’s not quite what I was looking for. (Better believe though, that I’m doing some sunflower designs in the summer) So, I hopped on over to Youtube to find some easy DIY flowers. And eventually I found this fun, “cheat” tutorial from xoJahtna that gave me the great idea to try out rose nail art for the first time.
What I Used:
- Base Coat: Orly – Bonder
- 1st Color: China Glaze – In A Lily Bit
- 2nd Color: Twinkled T – Queen Bee
- 3rd Color: OPI – Dutch Tulips
- 4th Color: Bundle Monster – Mistletoe Magic
- 5th Color: Sally Hansen Insta-Dri – Mauve It
- Top Coat: Glisten & Glow – Top Coat
- Bundle Monster Mini Lotus mat
- Bundle Monster double sided nail art brush/dotting tool
- nails polish remover
- Twinkled T clean up brush, size #2
I started with base coat, and two different colors of purple. I did two coats of Twinkled T-Queen Bee on my middle nails, and two thick coats of China Glaze-In A Lily Bit on the rest of my nails. I’ll be honest, In A Lily Bit is not my favorite formula, but I still absolutely love it because it has sentimental value. Does anyone else have a polish like that? Well immediately after painting these colors, I was feeling pumped. They just look so cute together! I was almost tempted to leave them there, but that would be a little too boring.

Next, I went on to practice my flowers. I was originally going to do the simple, beginner friendly, dotticure flowers. But as I was looking around for more tips and tricks, I found the video on how to “cheat” at roses, and I just had to try them. As you can see, I tried a lot before actually working on my decals.


I then carefully lifted the decals from the mat, and placed them on the newly applied top coat on my nails. I got a little messy with my ring fingers. So I had to try to fix it with my dotting tool and the light purple. It still looked messy, but I was hoping the top coat would even everything out.

And that was it! I had to double up on top coat for the nails with the roses. And I honestly think what took me the longest to do was all the practice. They’re not perfect, but I think they’re great for my first time. 😊


I hope everyone has a great week, and tries something new! You never know, you might have some fun.
Update:
I’m not sure whether to be proud or disappointed this week. There weren’t any chips, and my nails only had normal wear and tear. That is, until I started picking just hours before removing my manicure. So the pictures make it look like they didn’t hold up as well as they actually did. I’m proud of the polish for holding up, and for myself for being gentle on them, but also disappointed that I couldn’t help myself from picking. I guess if there’s ever a good time to pick, it’s right before taking the polish off.


